Figure Skating Toe Loop: A Step-by-Step Guide to Technique, Drills, and Common Mistakes
A figure skating toe loop is a toe-assisted jump taken off from a back outside edge, using the free foot’s toe pick to vault into the air, and landing on that same back outside edge. Clean execution depends on a strong setup edge, a quick toe-pick assist, and a compact, centered air position.
I’ve taught the toe loop to a lot of skaters over the years, from tiny beginners just off their first back crossovers to kids working toward their first double. It’s usually the first toe-assisted jump a skater learns, and how well you build it now sets the tone for the flip, the lutz, and everything toe-assisted that comes later. In this guide, I’ll walk you through the setup, the takeoff, the air position, and the landing, step by step, the same way I break it down for my students on the ice here in the Bay Area.
What Is a Toe Loop in Figure Skating?
A toe loop is one of the six fundamental jumps in figure skating, and it’s toe-assisted, meaning the free foot’s toe pick digs into the ice to help launch the skater into the air. It takes off from a back outside edge and lands on that same back outside edge, on the same foot.
That ‘same edge in, same edge out’ pattern is part of what makes the toe loop such a great teaching jump. It isolates the toe-pick assist and the rotation without asking a skater to also change edges or feet mid-jump, the way some other jumps do.
Learning how to do a toe loop well matters beyond just checking a box on a test. It builds:
- Edge control on a back outside edge, which shows up in spins, other jumps, and general skating skill
- Rotational timing, since the toe loop teaches the body how to organize a fast, efficient turn in the air
- Toe-pick mechanics that transfer directly to the flip and the lutz later on
In a typical jump progression, the toe loop usually comes after the waltz jump and often before the loop and the lutz. It’s not usually the very first jump a skater ever attempts, but it tends to be the first one that introduces toe-assisted takeoffs.
The Toe Loop Takeoff: How to Set Up the Entry
The toe loop takeoff starts well before the skater leaves the ice — it starts with the quality of the back outside edge underneath them. Get that edge right, and the rest of the jump gets a lot easier to teach.
Here’s how I break the entry down with my students:
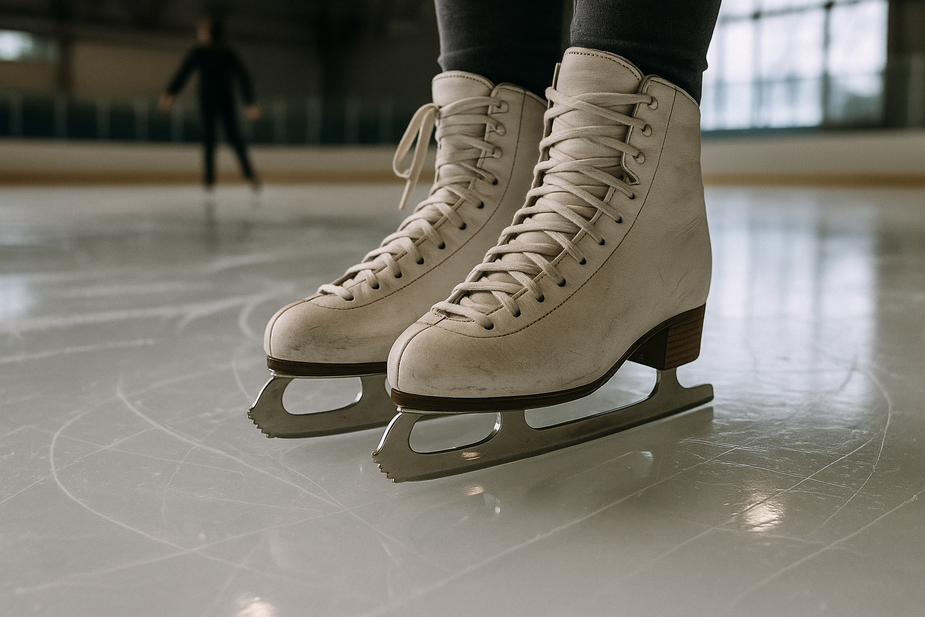
The approach. The skater travels backward on a back outside edge with a bent skating knee. That bend isn’t just for show — it’s what gives the jump its spring. A straight, locked knee going into the toe tap almost always means a flat, low jump.
Free leg position. The free leg trails behind the body and sits slightly outside the curve of the circle the skater is tracing. It should feel ready and relaxed, not stiff, because it’s about to do an important job.
Toe-pick placement. This is where I see the most correctable mistakes. The toe pick needs to touch down close to the tracing line of the skating foot — not way off to the side, and not directly on top of it either. Too far outside the tracing and the skater’s balance pulls off-center. Too far underneath and there’s no room for the body to rotate cleanly around it.
Timing. The toe tap should be quick and powerful, almost like a snap — not a long ‘hang’ where the toe sits on the ice while the skater waits. Think of it as a fast press-and-lift, not a slow lean.
Two Common Takeoff Mistakes
- A weak or unclear back outside edge. If the edge isn’t holding cleanly before the toe taps in, the whole shape of the jump changes. The skater might rotate too early, land off-balance, or feel like they’re ‘muscling’ the jump instead of flowing into it.
- Too much pre-rotation on the ice. Some skaters start turning their shoulders and hips before the toe pick even touches down. This turns what should be a true toe loop into what I call a ‘toe waltz’ — a jump that looks similar but skips the clean edge mechanics that make a toe loop technically sound.
The fix for both: go back to edges. I have skaters hold a clean back outside edge in a straight line, or on a shallow curve, with no toe tap at all, just to feel what a stable edge feels like under their blade. Once that edge is honest and repeatable, adding the toe tap becomes much simpler.
Toe Loop Jump Technique: What Happens in the Air
Good toe loop jump technique in the air comes down to one word: compact. The moment a skater leaves the ice, arms should be in close to the body and the free leg pulled in tight, not trailing loosely behind.
Staying ‘closed’ like this — arms and legs gathered toward the center of the body — is what keeps the rotation efficient. The tighter and more centered a skater is in the air, the faster and more controlled that rotation feels, without needing to force anything.
The most common mistake I see at this stage is a skater opening their arms or free leg too early, sometimes even before they’ve finished rotating. It usually happens because the skater is a little anxious about the landing and wants to ‘check’ early. Unfortunately, it has the opposite effect — it slows the rotation down right when the skater needs it most, and makes the landing harder to control instead of easier.
I like to give skaters a simple cue here: hug the rotation. Picture holding something close to your chest in the air, and don’t let go until you can feel the landing coming. Stay small on purpose, until your body tells you it’s time to open up.
There’s also a balance between height and rotation that’s worth understanding. A skater needs enough lift off the ice to have time to complete the rotation before unwinding into the landing position. This isn’t about jumping as high as possible — it’s about timing the lift so there’s just enough air time to finish the turn cleanly before the blade needs to find the ice again.
How to Land a Toe Loop Cleanly
A clean toe loop lands on the same back outside edge the skater took off from, with the body checked and controlled rather than wobbling to find balance. Here’s what that looks like in practice.
- The edge: landing happens on the same back outside edge as the takeoff — this consistency is part of what defines the jump.
- The free leg: it extends back in a controlled, checked position. It should feel placed, not flung. A free leg that swings loosely after landing is one of the fastest ways to lose balance.
- The upper body: shoulders and arms check out to stabilize the rotation and bring it to a clean stop, rather than continuing to spin past the landing.
- The eyes: spotting a fixed point on the landing helps the skater’s whole body organize around that stop, instead of the head trailing the rotation and pulling the skater off balance.
That ‘checked position’ — free leg extended and controlled, upper body stable, edge holding — is really the hallmark of a solid landing. It’s the difference between a jump that looks finished and one that looks like the skater is still fighting to stay up.
The most common landing mistake is letting the free leg fly open the instant the blade touches the ice. It might feel natural in the moment, especially for a skater who’s still building confidence, but it almost always disrupts balance right after landing. I coach skaters to think of the landing as its own skill, separate from the jump itself — worth practicing and checking on its own.
Drills and Progressions for Learning the Toe Loop
Good toe loop jump technique gets built in layers, not all at once. I always move my students through a progression rather than asking them to attempt a full jump on day one.
Here’s the order I use:
- Edge quality drill. No jump at all here — just sustained back outside edges, holding the correct shape and knee bend that will eventually support the jump. This is where the entry gets honest.
- Toe-pick placement drill. Skating backward and tapping the toe pick into the ice at the correct spot, without jumping. This trains the exact placement and the quick, snappy timing the jump needs, without adding the pressure of rotation yet.
- Takeoff timing drill. Combining the edge and the toe tap into one fluid motion, done slowly, before adding any real rotation. The goal here is rhythm — edge, tap, lift — not height or speed.
- Half-rotation attempts. Once the timing feels natural, we add partial rotation, building trust in the air position before asking for a full turn.
- Full single toe loop. Only once the earlier steps are consistent do we put the whole thing together.
| Progression Step | What It Builds | What to Watch For |
|---|---|---|
| Edge quality drill | Clean back outside edge, correct knee bend | Edge should hold shape without wobbling |
| Toe-pick placement drill | Correct tap location and timing | Tap should be quick, not a long hold |
| Takeoff timing drill | Fluid edge-to-tap connection | Motion should feel like one smooth action |
| Half-rotation attempts | Trust in the compact air position | Arms and free leg staying pulled in |
| Full single toe loop | Complete jump with checked landing | Landing edge holds, free leg checks out |
Falling is a completely normal part of this process. As a skater’s timing develops, there will be attempts that don’t come together, and that’s simply part of learning the jump — it’s not a sign that something is wrong.
As for knowing when a skater is ready to move to the next step, I look for consistency, not a single lucky attempt. If a skater can hold a clean edge and tap the toe pick in the right spot with good timing over and over, that’s real readiness. One good attempt surrounded by shaky ones tells me we need more time at that stage before adding the next layer.
Toe Loop Variations and What Comes Next
Once a single toe loop is consistent, it opens the door to combinations, sequences, and eventually more advanced toe-assisted jumps. The figure skating toe loop you learn now is the same fundamental pattern used at every level above it.
A common next step is pairing the toe loop with another jump in a combination — for example, landing one jump and immediately taking off into a toe loop on that same landing edge, without extra steps in between. This is why a truly solid single toe loop matters so much: a shaky toe loop makes combinations much harder to build later.
The toe-assisted takeoff pattern you’re training also transfers directly to other jumps down the road, especially the flip and the lutz. Both of those jumps use a similar toe-pick assist, but they take off from a different edge than the toe loop does.
- Toe loop: takes off from a back outside edge
- Flip: takes off from a back inside edge
- Lutz: also takes off from a back outside edge, but on the opposite curve, with a longer, more controlled entry
Understanding that distinction early — outside edge versus inside edge — helps skaters avoid confusion and bad habits when they start learning the flip later on.
As for doubles and beyond, they build on these exact same fundamentals: the same compact air position, the same checked landing, just with faster rotation. I never promise a specific timeline for when a skater will land a double — every skater’s path looks a little different — but I can say that a clean, consistent single toe loop is genuinely the foundation everything else stands on.
Frequently Asked Questions
Why do I keep falling backward on my toe loop?
Falling backward usually traces back to one of a few causes: an unclear back outside edge on the entry, a slow or heavy toe-pick action instead of a quick tap, or opening the body too early instead of staying compact through the rotation. Go back to the edge quality drill first — most landing issues start at the entry.
What’s the difference between a toe loop and a flip?
Both are toe-assisted jumps that use the free foot’s toe pick to help launch into the air. The difference is the edge: the toe loop takes off from a back outside edge, while the flip takes off from a back inside edge.
How long does it usually take to learn a solid toe loop?
It varies quite a bit by skater and by coaching approach, so I’m cautious about giving a fixed timeline. What matters more than speed is consistency — clean edges and reliable toe-pick timing are the real markers of progress.
Should I practice toe loops every day?
There’s no single frequency that works for every skater. What I care about more than sheer volume is focused repetition — quality reps on edge control and toe-pick timing tend to move a skater forward faster than a high number of rushed attempts.
Can I do a toe loop if I’m a beginner?
Most coaches, myself included, introduce the toe loop once a skater has solid backward skating and edge control, along with basic jump fundamentals already in place. It’s rarely a skater’s very first jump, but it often comes early in the progression once those pieces are solid.
Learning the toe loop takes patience, and that’s completely normal. I’ve coached this jump for a long time, including in my early years working with Alysa Liu back when she was a young skater building her foundational jumps, and the skaters who progress the most steadily are the ones who trust the technical steps instead of rushing past them. Build the edge, build the timing, build the air position — in that order — and the toe loop becomes a jump you can rely on, and a real foundation for everything you’ll learn next on the ice.