Spread Eagle Figure Skating: Technique, Body Position & Progression
A spread eagle in figure skating is a two-footed move where both blades stay on the ice, feet turned outward in opposite directions, traveling along the same curve — one foot on a forward edge, the other on a matching backward edge. In the outside spread eagle, both skates hold outside edges throughout.
I’ve taught this move to skaters at every level, from kids just off their basic skills badges to competitive skaters polishing it for a program entrance. It’s one of those elements that looks simple from the stands and is actually a deep test of edge control. I want to walk you through exactly what a clean spread eagle looks like, how we build it step by step, and what to do when it’s not quite clicking yet.
This move shows up early in a skater’s technical vocabulary because it teaches edge quality in a way nothing else does. Later on, it becomes a program staple — a beautiful connecting move into a jump entrance or a way to cross the ice with presence. Get the spread eagle technique right early, and it pays off for years.
What Is a Spread Eagle in Figure Skating?
A spread eagle is a two-footed gliding position where both blades stay on the ice at the same time, feet rotated outward in opposite directions, tracing matching curves. One foot travels forward, the other travels backward, and both follow the same arc — not two separate paths.
When both skates hold outside edges simultaneously, that’s the outside spread eagle — the version most people picture and the one skaters usually learn first. There’s also an inside spread eagle, using inside edges instead, which is less common in everyday skating but uses the same principles.
People often confuse the spread eagle with a few other moves, so let’s clear that up:
- Ina Bauer: Also has one foot forward and one foot back, but the alignment is different — the feet aren’t turned into spread-eagle position, and skaters typically use a deeper knee bend to create that dramatic backward lean. It’s a cousin move, not the same skill.
- Biellmann: Completely different animal. It’s a one-footed spin position with the free leg pulled overhead. No shared mechanics with the spread eagle at all.
- A single outside edge on one foot: Just one blade on the ice, no second foot matching the curve. The spread eagle specifically requires both blades tracing together.
The spread eagle is also recognized in U.S. Figure Skating’s edge-element terminology, which tells you it carries weight both as a technical skill and as a choreographic tool. Coaches and judges look at it for edge quality, and choreographers love it for the line it creates across the ice.
Outside Spread Eagle Technique — Body Position Breakdown
Getting a spread eagle to look clean and feel stable comes down to a handful of body position details working together. Let’s go piece by piece.
Foot Placement
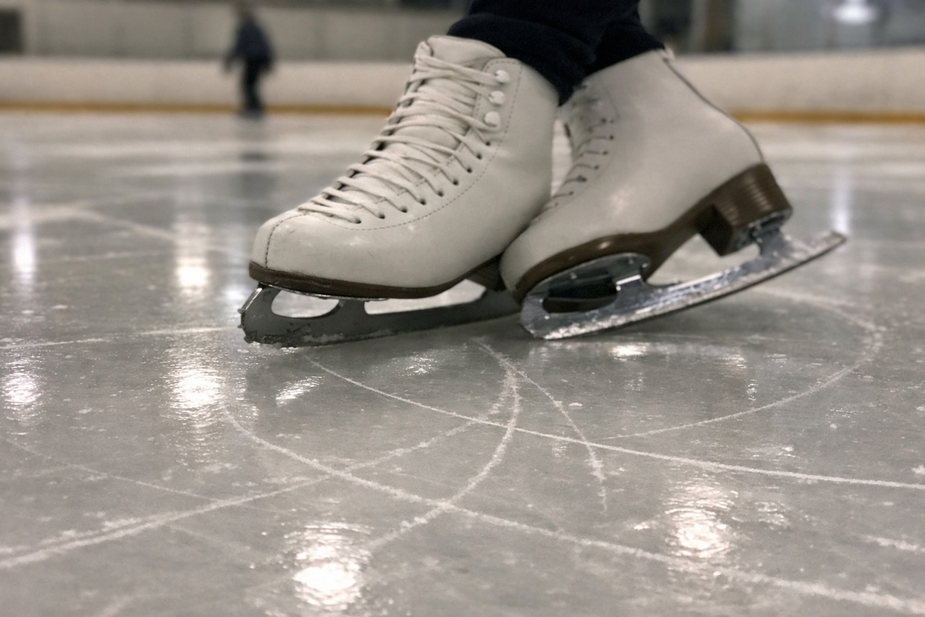
The skates rotate outward so the feet point away from each other, almost like a letter V opened up along the direction of travel. But here’s what I tell every skater: it’s not about how wide your stance gets. It’s about whether that blade is holding its edge the entire time.
A blade that flattens out or rolls inward isn’t doing a spread eagle — it’s just standing on the ice while drifting. The edge has to stay engaged, curved, and intentional from entry to exit.
Hip and Knee Position
The hips need to open up to let the feet rotate outward naturally. The knees should track in the same direction as the toes — always.
Here’s the order I coach this in, every time:
- Establish a manageable foot position first. Don’t chase a wide stance before the basics are solid.
- Keep both knees aligned with blade direction. This has to happen before you add any width.
- Lock in the edge before widening the position. Width is the last thing we add, never the first.
The most common mistake I see is knees caving inward. It happens when a skater opens their feet wider than their current control allows. When the knees cave, the edge can’t stay engaged — both blades lose their grip on the curve, and the whole position gets unstable fast.
Spine, Head, and Shoulder Carriage
The upper body needs to stay lifted — not folded forward at the waist. I use a handful of cues here that skaters respond to well:
- ‘Keep the chest open.’
- ‘Shoulders level with the curve.’
- ‘Quiet head.’
- ‘Neutral chin.’
The most common fix I’m making in lessons is correcting a torso that leans ahead of the blades. When that happens, I slow the skater down and bring back the lifted-chest cue until the body catches up with where the edges actually are. Arms extend out for balance and presentation, but they’re not the main stabilizer — that job belongs to the edges and the core alignment of the body.
Weight Distribution
Balance should sit centered over both blades, with even pressure on whichever edges you’re using. When I’m watching a skater’s spread eagle, I’m checking:
- Both blades tracing cleanly, without wobble
- Knees aligned with the direction of the feet
- Torso centered, not leaning
- No scraping or chatter sound from the blades
- One smooth, continuous curve from start to finish
How to Do a Spread Eagle — Step-by-Step Progression
This is the part most parents and skaters are really asking about — how do you actually build this skill? Here’s the six-step progression I use on the ice.
- Straight skating and basic balance. Before anything else, posture and blade placement fundamentals need to be automatic.
- One-foot outside edges. Clean forward and backward curves, on each foot individually, with no wobble.
- Two-foot edge awareness. Feel how both blades respond when the feet turn outward together, even without a full spread yet.
- Partial spread position. A small, manageable opening — keeping the edge quality intact is the priority, not the size of the position.
- Sustained spread eagle. Extend the hold along a controlled curve, building duration gradually.
- Program application. Add arms, transitions, musicality, and changes of direction once the base skill is reliable.
I’ll say this as directly as I can: a wide spread eagle with weak edges is worse than a small one with clean tracing. Judges, choreographers, and frankly your own eyes watching video will always pick out the shaky wide version over the quiet, controlled narrow one.
Forward vs. Backward Spread Eagles
The backward outside-edge version is the one most skaters encounter first — it’s the classic, recognizable spread eagle most people picture. The forward version comes later, once a skater has shown solid edge control in both directions.
Readiness for the forward spread eagle isn’t about age. It’s about edge control, body alignment, and whether the skater can exit the position safely and deliberately under their coach’s supervision. I’ve had younger skaters ready for it sooner than expected and older skaters who needed more time — it depends entirely on where their edges are at.
Spread Eagle Coaching Cues Every Skater Should Know
These are the verbal cues I use constantly on the ice. If your skater hears these from me, here’s what they mean:
- ‘Stay on the edge.’ The blade needs to travel a defined curve — not go flat under the foot.
- ‘Open from the hips, not the knees.’ The rotation should start at the hip joint, not get forced or twisted through the knee.
- ‘Keep the torso over the skating path.’ This keeps the body from collapsing forward and preserves the line of the move.
- ‘Let the arms assist, not compensate.’ Arms are there to support the presentation — they shouldn’t be doing the work of masking an unstable edge underneath.
- ‘Hold the exit.’ The true test of quality isn’t just hitting the position — it’s how controlled the skater looks coming out of it.
Practice Drills to Build a Strong Spread Eagle
Here are the drills I actually use in lessons, in the order I tend to introduce them.
- One-foot outside-edge curves. Practice forward and backward on each foot separately. Focus on consistent tracing, quiet shoulders, a stable head, controlled speed, and a deliberate exit every single time.
- Two-foot edge glide. Glide on both feet and gradually open into a manageable spread. The goal is holding the curve, not chasing maximum width.
- Short holds. Do brief entries and exits, repeated several times, so your coach can check edges, knees, torso, and arms all together in a short window.
- Speed variation. Start slow. Only add speed once the position itself and the exit are consistently reliable.
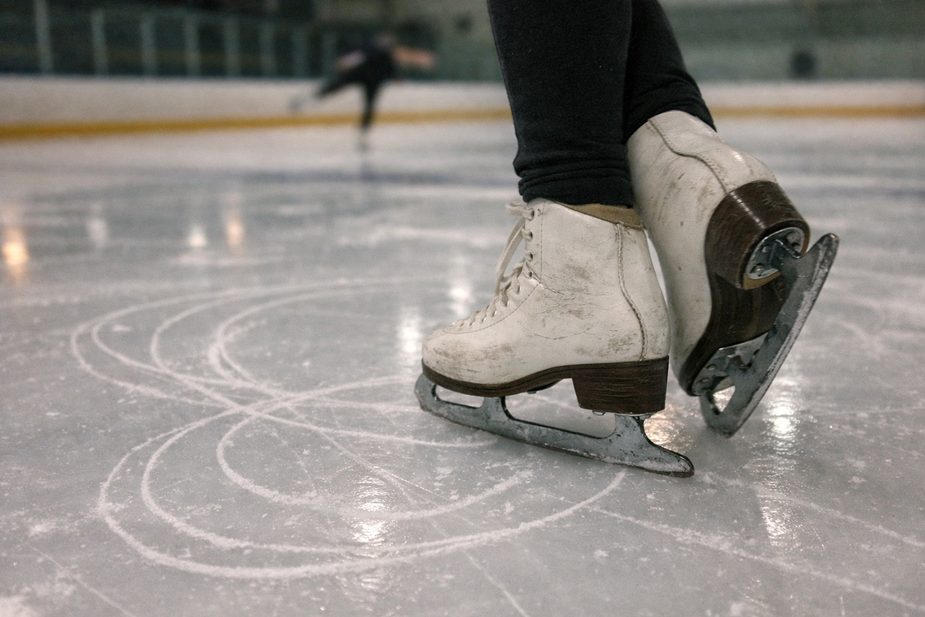
- Line and curve awareness. Use the rink markings or a coach’s reference points on the ice to compare a clean, consistent curve against a path that’s drifting or zigzagging.
How Do You Know If Your Spread Eagle Technique Is Working?
You’ll know your spread eagle technique is working when both blades stay engaged on their edges, the travel is smooth with no sideways scrubbing, and the skater can hold a brief position with a clean, controlled exit — repeatably, not just once.
Here’s my full checklist:
- Both blades stay engaged on their chosen edges
- Smooth travel across the ice, with no sideways scrubbing sound
- Knees aligned with the feet the entire time
- Shoulders level, torso lifted rather than collapsed
- One consistent, unbroken curve — not a wandering path
- A brief hold followed by a clean exit, with no stumble
- The quality repeats across multiple attempts, not just a lucky one
One thing I always remind skaters and parents: a deeper edge or a wider position isn’t automatically better. Control, continuity, and presentation matter far more than how dramatic the position looks.
Common Spread Eagle Mistakes and How to Fix Them
Here’s how I actually talk through these issues in lessons, problem by problem.
| Mistake | What’s Happening | Fix |
|---|---|---|
| Knees caving inward | Position is too wide for current control | Shrink the width, realign knees over toes, center the torso, rebuild gradually |
| Leaning forward at the waist | Torso drifting ahead of the blades | Cue a lifted chest, slow the speed, stop bending at the waist |
| Blades flattening out | Position too wide or too fast | Return to one-foot outside edges, then reintroduce a smaller two-foot spread |
| Drifting into a straight line | Losing the edge lean, steering feet independently | Remind the skater to preserve edge lean rather than guiding feet separately |
| Looks wide but unstable | Prioritizing visual width over control | Prioritize edge quality, posture, and exit — smaller and controlled beats big and shaky |
When Should a Skater Learn the Spread Eagle?
There’s no fixed age or level where a skater should learn the spread eagle — readiness is about skill, not the calendar. I’ve coached this to different skaters at very different points in their development, based entirely on where their edges were.
Here’s my readiness checklist before I introduce it:
- Reliable one-foot outside edges, forward and backward
- Real control over both forward and backward curves
- Upright skating posture that holds up under speed
- Ability to follow edge and alignment cues in real time
- A controlled entry and exit on simpler elements
As the coach, I’m the one choosing the right version for that skater — a smaller spread, a slower entry, maybe starting with one edge before the other. It’s never forced, and it’s never treated like some kind of flexibility test. It’s a skill built on control, plain and simple.
Does Learning a Spread Eagle Help With Other Skating Skills?
Yes — the spread eagle builds skills that carry over directly into a skater’s broader technical development. It strengthens outside-edge control, two-foot coordination, and curve management, all of which show up again and again in other elements.
Specifically, I see the carryover in:
- Outside-edge control that improves jump entrances and footwork
- Two-foot coordination that helps with other transitional moves
- Better curve management across all edge work
- Smoother transitions between forward and backward skating
- Stronger upper-body carriage that shows up in spins and across the ice generally
- More musical presentation and a cleaner overall line in programs
Because it sits in U.S. Figure Skating’s formal edge-element terminology, it carries both technical weight and choreographic value — which is part of why you’ll keep seeing it long after a skater first learns it.
I’ve worked with skaters at every one of these stages throughout my years as a coach in the Bay Area, including early in my career coaching Alysa Liu during her childhood and junior years. Watching an edge element like this develop from a shaky first attempt into something a skater performs with confidence in a program is one of the most rewarding parts of my coaching work.
Frequently Asked Questions
How long does it take to learn a spread eagle in figure skating?
It varies quite a bit by skater. Some pick up the position itself fairly quickly but need more time to build a stable edge and a clean exit. I’d rather track progress through cleaner tracings, better knee alignment, and a more controlled entry and exit than through any fixed timeline.
What’s the difference between a spread eagle and an Ina Bauer?
Both involve one foot forward and one foot back, which is why they’re easy to mix up. But a spread eagle keeps matched outside (or inside) edges along the same curve, while an Ina Bauer uses a different body alignment and often a deeper knee bend.
Can beginners learn an outside spread eagle, or is it an advanced move?
It builds directly on one-foot outside edge control, so skaters usually work toward it once they’re comfortable with solo forward and backward outside edges. It’s not a day-one skill, but it’s also not reserved only for advanced skaters — it’s more about readiness than level.
Why do my skater’s knees cave in during a spread eagle?
Almost always, the position is wider than their current edge control can support. Narrow the stance, realign the knees directly over the toes, and rebuild the width gradually from there.
Is a spread eagle performed on a straight line or a curve?
It’s performed on a curve, and that curve is actually part of what reveals true edge quality. Skaters should focus on preserving the edge lean throughout the move rather than forcing a straight path.
A spread eagle is a building block — valued for edge control, alignment, and presentation, not for how wide or dramatic it looks. The skaters who develop the best ones aren’t the ones who rushed the width; they’re the ones who built it patiently, one solid edge at a time.
If your skater is working toward their first spread eagle or refining one that’s just not quite clean yet, get a qualified coach’s eyes on it in person. There’s no substitute for real-time feedback on edges, alignment, and timing — and that personalized coaching is exactly what turns a shaky attempt into a confident, repeatable skill.