Jump Landing Technique: How to Build a Stable, Repeatable Landing Position
Solid jump landing technique comes from landing on a clear, controlled edge with the free foot placed directly behind the skating foot, knee and ankle absorbing the impact, and the upper body aligned over the landing side. Consistent jump landings aren’t luck—they’re built through accurate body position, edge control, and repetition of the correct shape.
I’ve watched thousands of jumps land in my years on the ice, and here’s what I tell every skater I work with: landing is where a jump either ‘reads’ as clean or falls apart in front of the judges’ eyes. So many skaters treat the landing like something that just happens after the real work of the jump is done. It’s not. Landing is an active, trained skill, just like the takeoff or the air position, and it’s coachable at every level—from a skater chasing their first axel to one polishing senior-level content.
What Does a Correct Figure Skating Landing Position Actually Look Like?
A correct figure skating landing position has a bent skating knee, a flexed ankle, the free leg extended behind the body with the free foot directly behind the skating foot, aligned shoulders, and a steady head looking ahead along the curve. It’s one organized shape, not a collection of last-second adjustments.
Let’s go through the checkpoints one at a time, because each one has a specific job to do:
- Skating (landing) leg: The knee is bent, the ankle is flexed, and the weight sits centered over the blade—not dropped back on the heel, not perched forward on the toe pick area. That centered weight is what lets the leg act like a shock absorber instead of a rigid post.
- Free leg: It extends behind the body, and the free foot lands directly behind the skating foot—not out to the side, not wrapped around the front or back of the leg. When the free foot drifts off that line, balance gets harder to hold immediately.
- Shoulders: They stay aligned with the skating foot and face into the circle of the landing curve. If the shoulders twist away from the direction of travel, the body fights itself instead of flowing with the landing.
- Free hip: It stays connected to the hip line established at takeoff—no ‘opening up’ early. Early opening is one of the most common reasons a landing looks rushed even when the rotation was actually fine.
- Arms: Organized and controlled, not flailing for balance. One arm typically leads slightly, mirroring the line of the shoulders, rather than both arms windmilling to catch balance after the fact.
- Head: Up and steady, eyes looking ahead along the curve—not down at the ice. A dropped head pulls the whole upper body out of alignment with it.
Here’s why this matters: this position is what absorbs momentum, keeps the blade secure on one edge, and prevents the foot from twisting or sliding out from underneath. One important coaching note—the upper body isn’t rigid or perfectly vertical at the moment of contact. There’s a slight, controlled forward lean built in, not a stiff pose held for a photo. When you watch a landing that ‘reads clean,’ you’re watching one organized shape settle into place, not a scramble of small corrections.
Why Landing Edge Control Is the Most Overlooked Part of a Jump
Landing edge control means landing on the intended edge and holding it cleanly, with no flat skidding, no scraping, and no premature two-footing. It’s the difference between a landing that looks decisive and one that looks like it’s searching for the floor.
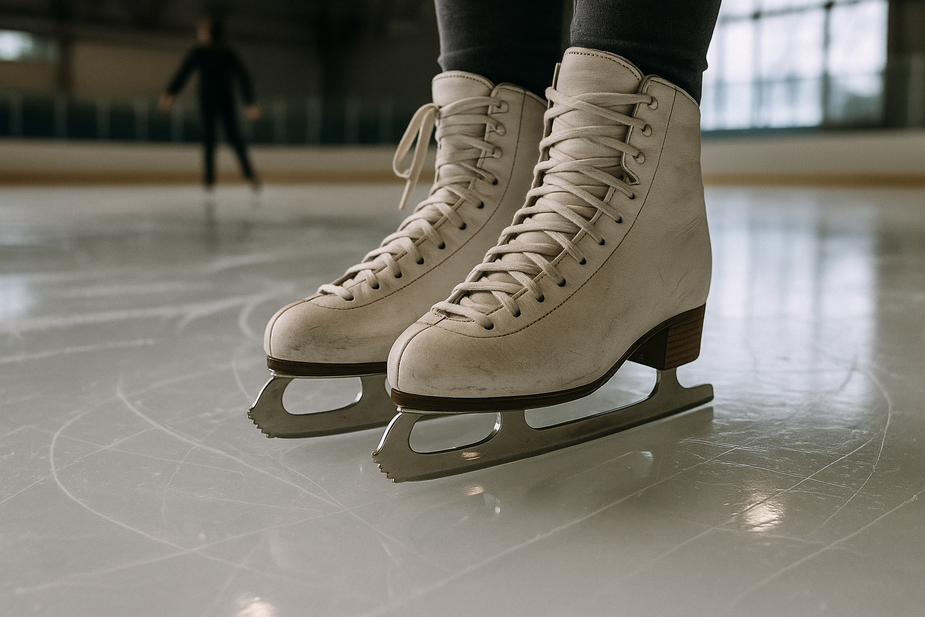
Here’s the sequence most skaters don’t realize is happening under their feet: the blade first makes contact on the toe or forward part of the blade, and then the skater settles back through the ankle and knee onto the rest of the blade as it absorbs the landing. This is a sequence of contact, not a choice between a ‘front edge’ and a ‘back edge.’ Trying to think of it as an either/or often makes skaters stiffen up trying to pick the ‘right’ edge instead of letting the blade load naturally.
Edge awareness can’t start after the skater is already back on the ice—it has to start before takeoff. Jumps are classified partly by their landing edge, which means the whole air position and rotation are set up with that landing edge in mind from the very first push. For instance, understanding toe loop mechanics and how that jump sets up its specific landing edge is one concrete way to see how takeoff and landing connect.
The tell is easy to spot once you know what you’re looking for. When the edge is unclear, the landing looks rushed, flat, or split between two feet, like the skater is hedging their bets. When the edge is secure, the landing reads as one clean line from touchdown to exit. My advice to skaters working through inconsistent landings: if your landings feel inconsistent, check your edge before you check your rotation. Edge problems often masquerade as rotation problems, and chasing the wrong fix wastes a lot of ice time.
The Three Phases of a Jump Landing (Entry, Absorption, Exit)
Jump landing technique breaks down into three connected phases—entry, absorption, and exit—that happen in under a second but can each be trained and felt separately. Understanding them individually is what makes landings trainable instead of mysterious.
Entry Into the Landing
Rotation should be essentially complete while the skater is still up in the air. That’s not a small detail—it’s what creates the time to land softly instead of colliding with the ice mid-rotation. A skater who’s still turning as they touch down is fighting gravity and rotation at the same time, and something has to give.
The landing leg should be extended at the moment of contact, not already bent. This gives the skater the maximum available range to absorb force after touching down. If the knee is already bent before contact, there’s nowhere left to go, and the landing jolts instead of settles.
My go-to cue here: meet the ice, don’t rush the ice. Skaters who rush tend to reach for the landing early, which shortens their rotation time and throws off the whole sequence.
The Absorption Phase
Once the blade contacts the ice, the ankle and knee flex to absorb the landing. This is active control—not stiffness, and not collapsing. There’s a real difference in feel between a controlled bend that settles the body downward smoothly and a stiff jolt where nothing gives, or a knee that buckles inward or downward too far and loses its structure.
This is also where the toe-to-full-blade loading sequence from the edge control section physically happens. The blade rolls back through its full length as the joints flex, and that rolling motion and the joint flexion are doing the same job at the same time: spreading the force of the landing out instead of taking it all at once.
The Exit Phase
A good landing resolves into a sustained, held edge that can flow into the next movement—a connecting step, a spread eagle, another jump. If the landing has no flow and stops dead, it’s ‘stuck.’ If the skater arrives out of control and grabs for balance late, it’s ‘crashed.’ Neither one is the goal.
Good landing quality is accuracy plus balance plus maintained flow—not just staying upright for a beat before the next scramble. A landing that’s technically ‘made’ but has no flow still isn’t doing its full job in a program.
These three phases—entry, absorption, exit—blend together in under a second on the ice, but in training, each one can be isolated, slowed down, and felt on its own before putting the whole sequence back together at speed.
How to Build Consistent Jump Landings (Training Progressions)
Consistent jump landings come from training the landing shape deliberately in progressive steps, not from just repeating full jumps and hoping the landing improves on its own. The core principle I hold every skater to: quality of the landing shape matters more than sheer repetition. Repeating a flawed landing over and over just grooves the flaw in deeper.
Here’s the progression I use to build that shape from the ground up:
- Static landing position holds. Hold the final landing shape—bent knee, free leg behind, shoulders aligned—off a small hop or step. This teaches the body what ‘correct’ actually feels like without the pressure of a full jump attached to it.
- Returning to the landing position after a hop or small jump. Re-establish the same shape every single time, checking foot placement and edge before adding any more difficulty. This is where the shape starts becoming automatic instead of something the skater has to think through.
- Repeating the same jump from a controlled, consistent approach. Same speed, same setup, every time—so the only variable actually being trained is the landing itself, not a moving target of different entries.
- Varying speed and height. Once the base shape is reliable, test it against faster entries or bigger jumps to see whether the position holds up under more demanding conditions.
- Adding flow in and out. Connect the landing to steps or the next element, since a landing trained in isolation still has to function in the middle of a program.
Before adding speed or connections at any stage, ask: can the skater consistently show the same foot placement, body alignment, balance point, and sustained edge? If not, stay at the current step. Moving on too early just recreates the same inconsistency at a higher difficulty level.
Skaters need outside eyes for this work—a coach watching for the specific checkpoints—paired with their own developing feel for the difference between a landing that’s held and one that’s merely caught. Both pieces matter, and neither replaces the other.
Common Jump Landing Mistakes and What They’re Telling You
Every landing mistake is a signal pointing to a specific breakdown earlier in the jump—not just an error to grade, but information to use. Here’s how I read the most common ones with my skaters:
| Mistake | What it usually signals |
|---|---|
| Two-foot landing or delayed weight transfer | The landing wasn’t placed cleanly onto the intended edge, or balance wasn’t established fast enough on contact |
| Over-rotation or under-rotation | Points back to what happened in the air—rotation needs to finish with height to spare, not still be spinning down into the ice |
| Stiff, jolted landing | The ankle and knee froze instead of absorbing—conflicts with the controlled-flexion landing every clean jump needs |
| Collapsing landing | The landing side lost support and alignment broke down under force—the opposite of a sustained, balanced position |
To simplify it further: a rushed landing usually signals unfinished rotation. A flat landing usually signals unclear edge. A messy or split landing usually signals poor balance over the landing side. I encourage every skater to bring these observations to their coach rather than guessing at fixes alone—landing problems are chains of small causes, and untangling the chain is exactly what coaching is for.
Why a Reliable Landing Position Builds Confidence, Not Just Cleaner Jumps
A repeatable landing gives a skater a technical reference point they can trust instead of a jump they’re just hoping works out this time. That shift—from hoping to trusting—changes how a skater feels standing in the corner before they go for it.
There’s a bigger-picture payoff too. Organized landings make jump combinations and connected elements far more available, because the exit is already stable and ready to move into the next thing. A skater who has to scramble just to survive a single jump landing has nothing left to build a combination or a connecting sequence on top of.
In my years coaching skaters through their early years—including some real early success stories, which you can read about on my student and parent reviews page—I’ve found landing technique to be one of the highest-return skills to refine. Improve the landing, and it tends to improve the whole jump, not just the ending. It’s rarely the flashiest thing to work on in a lesson, but it’s often the thing that unlocks everything else.
This is a skill built over time through accurate repetition, not something that arrives overnight. Every skater I’ve worked with who has dependable landings got there through patient, specific practice—not a lucky day.
Bringing It All Together
Consistent jump landings come down to four things working together: a correct landing position, real edge control, clean timing through the entry-absorption-exit sequence, and quality repetition instead of quantity. Skip any one of those, and the landing will feel unpredictable even when the jump itself is strong.
My philosophy with every skater I coach is to work on landing position quality deliberately, rather than just chasing ‘did I land it’ as a pass-fail outcome. A jump can be technically landed and still be teaching the body the wrong habits if the shape underneath it is off.
Bring these landing checkpoints to your next lesson so your coach can watch for them specifically—knee and ankle flexion, free foot placement, shoulder alignment, and edge quality. Naming the exact thing you want feedback on tends to make the lesson time far more productive.
Frequently Asked Questions
How do I fix two-footed landings?
Focus first on the accuracy of foot placement and balance point on the blade at first contact. Then work on re-establishing the landing position cleanly every time, rather than trying to adjust your weight after the fact once you’re already down.
Why do my landings feel different every time?
Small differences in how completely the rotation finished, how the body was aligned at contact, and how clean the edge was can each change how a landing feels. Consistency comes from tightening up all three of those together, not from focusing on just one.
What’s the difference between a landing and a ‘stick’?
A landing, technically, includes the full exit and any flow that follows it. A ‘stick’ usually means the jump stopped dead with little to no flow. Most coaches, myself included, prioritize a sustained, flowing landing position over simply stopping in place and holding still.
Should I be landing on my front edge or my back edge?
Rather than thinking front versus back, think of it as a sequence. The blade loads from the toe and forward part first, then settles back through the ankle and knee as the landing absorbs the impact. It’s a smooth transition, not a single edge choice made in an instant.
Why do I fall on the same jump sometimes but not others?
Landings depend on a chain of factors—how complete the rotation was, body alignment, balance point, and edge accuracy. A small shift in any one of those can change the outcome from clean to unstable, even on a jump you’ve landed plenty of times before.